
Eras Tour shadow box in 13 steps
Are you looking for a creative way to showcase your Eras Tour memories? Follow this easy tutorial to create your own shadow box.
What you need
A shadow box frame
I live in the UK, therefore I went to Hobbycraft and purchased a 25x25cm frame which is perfect for an A5 landscape print. Hobbycraft sell them in white, black, grey and light wood.
Friendship bracelets
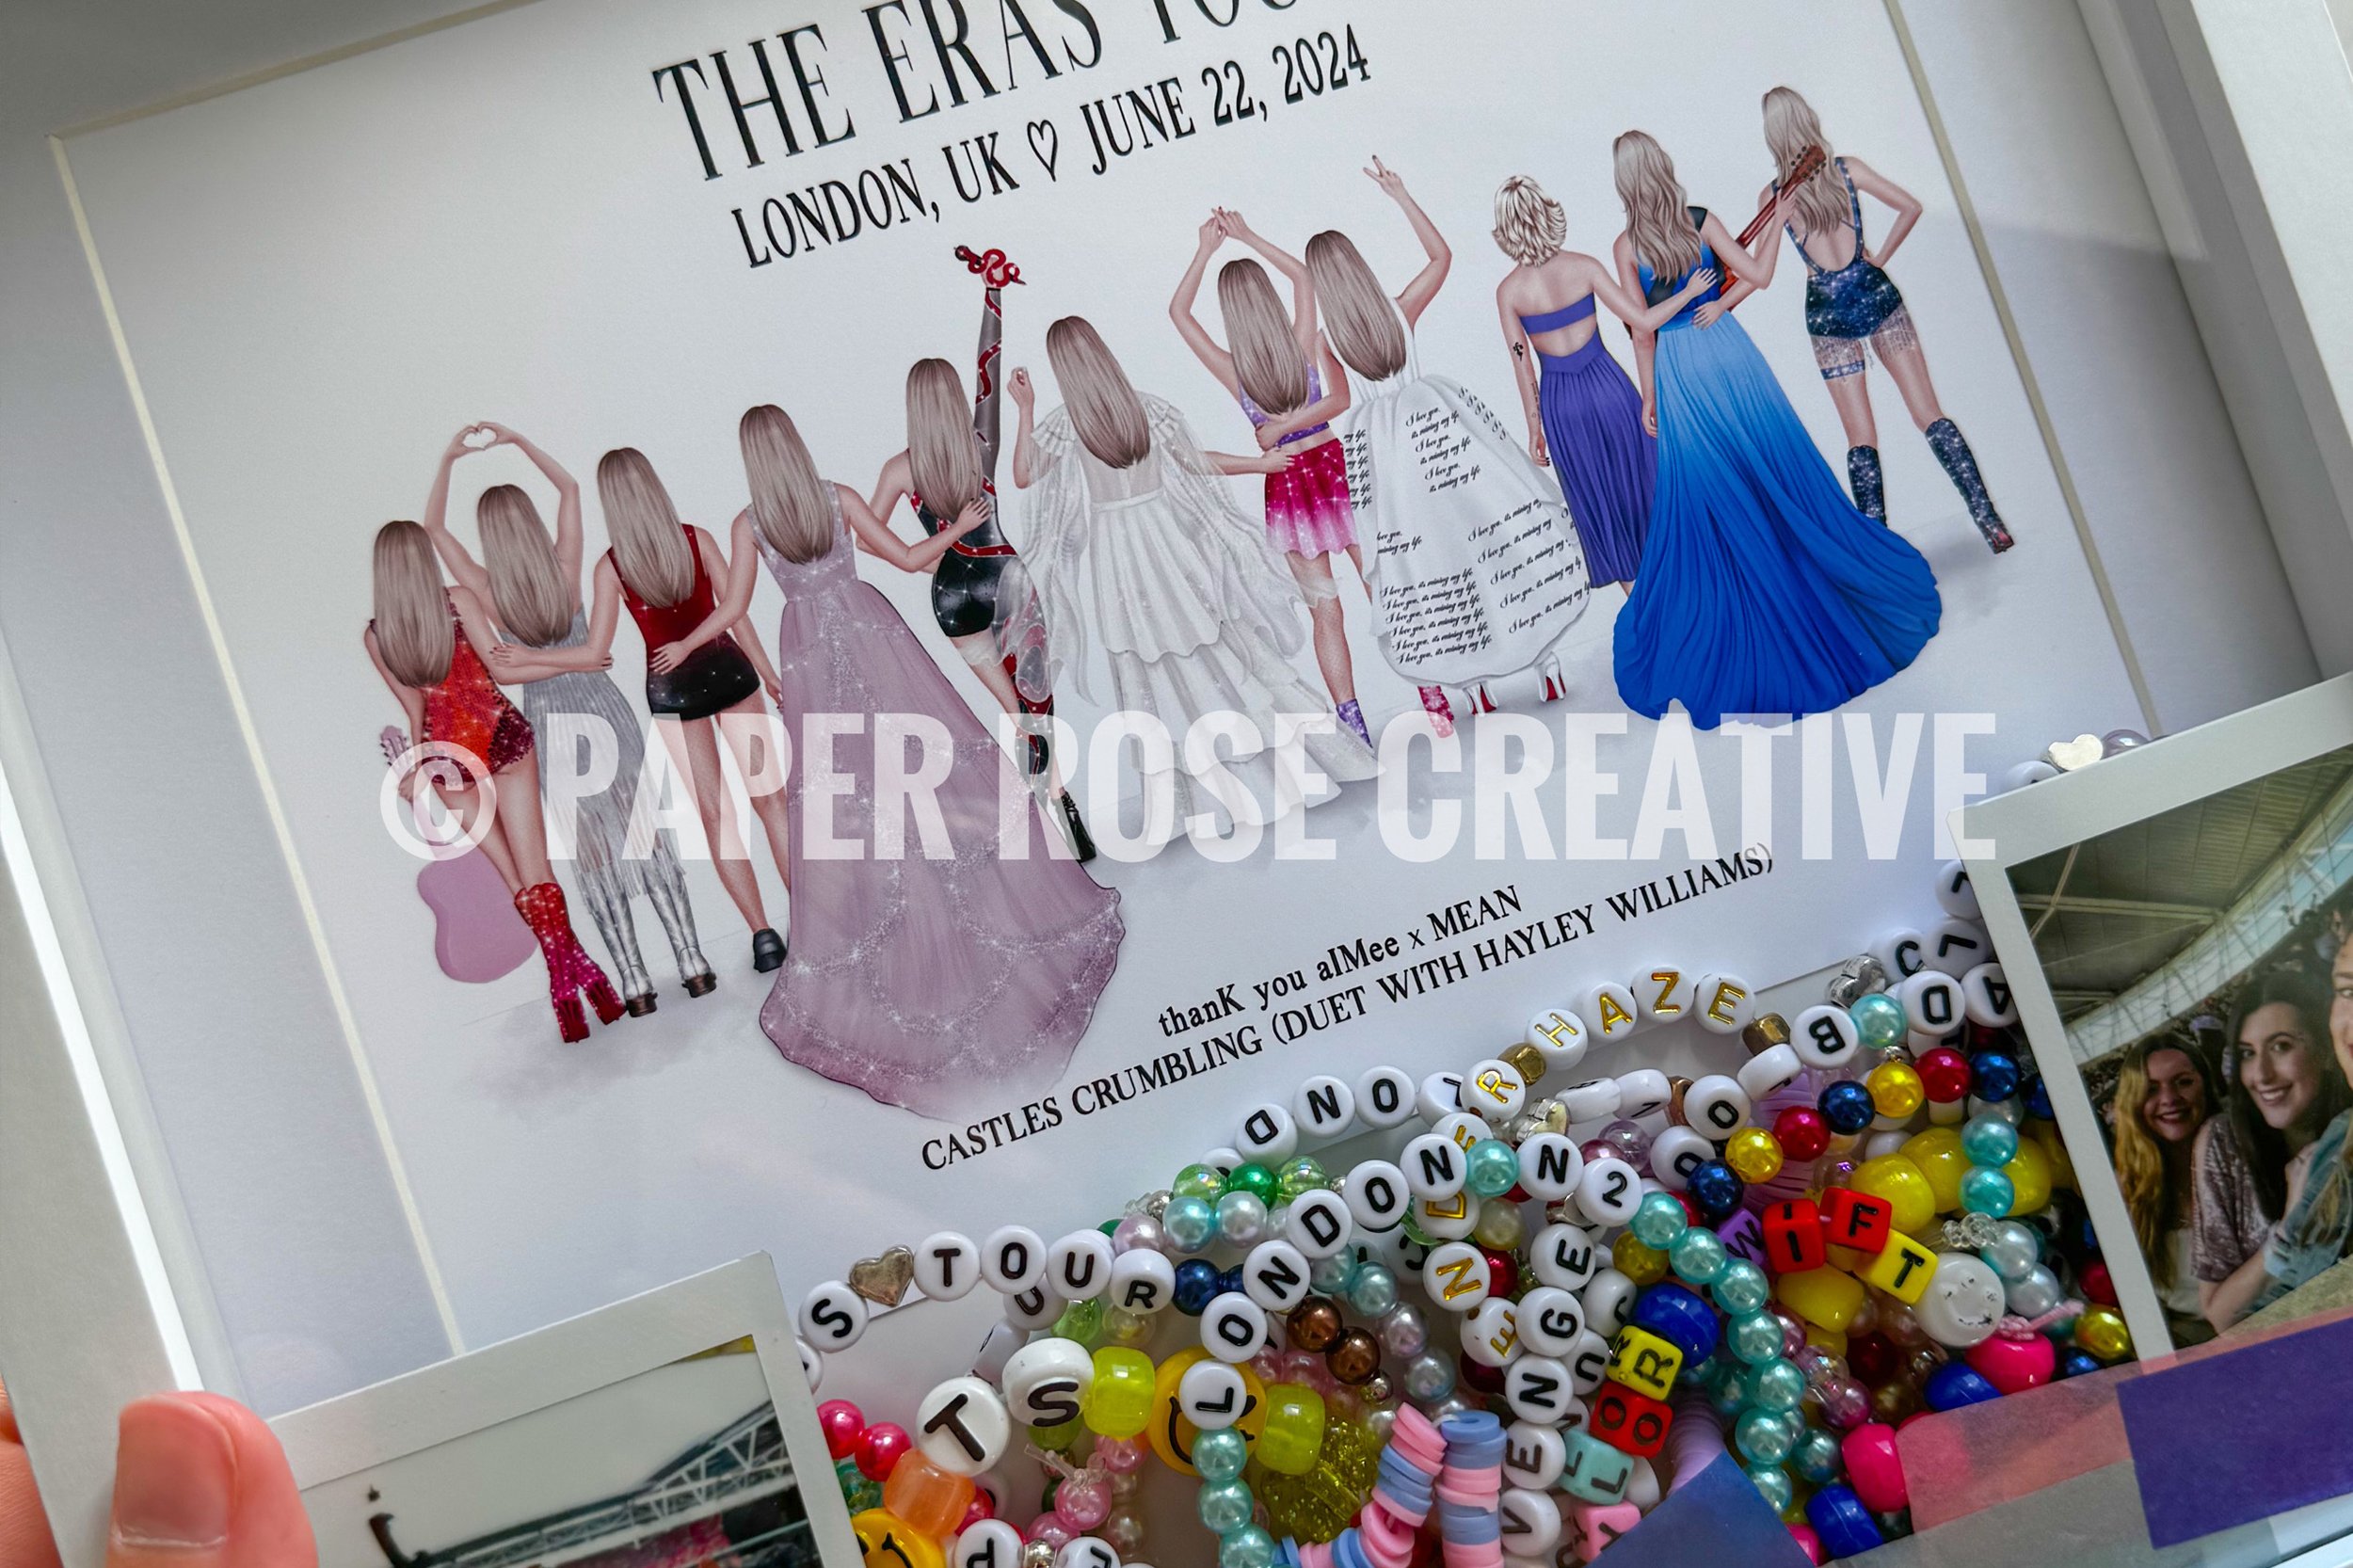
It wouldn’t have been The Eras Tour without trading some friendship bracelets! Gather together a couple of handfuls.
Confetti
If you were able to secure some Eras Tour confetti, gather around 10 pieces, otherwise skip this step.
Photos
Add a personal touch by printing off two of your favourite photos from your show of you and your friends. I used an Instax mini polaroid printer for mine.
Sticky tabs (or some tape)
You will need something to secure your Paper Rose Creative print to the frame. These sticky tabs are perfect as you can peel them off the print with no mess if you make a mistake.

Paper Rose Creative print
Once you have your print, you’re ready to go! Remember, A5 size is the perfect choice for a 25x25cm shadow box!
The print I am framing is London N2 Special Edition.
Arranging your frame
Insert the plastic mount
I’m not sure what the official word is for it, but I will call it the plastic mount! Put this into the frame first to ensure that your print sits towards the back. This creates some space at the front for your bracelets.
Attach your print to the paper mount
Align your A5 print with the top of the mount. Secure with sticky tabs (or a small amount of tape).
Arrange your confetti
This is optional. Arrange confetti at the bottom of the frame in a single line.
Add your photos
Place one photo to each bottom corner.
Secure with bracelets
The friendship bracelets are the things that hold your photos and confetti in place. You need to ensure you have enough bracelets across the whole bottom width of the frame. Place your favourites in the middle as they will be the ones you’ll see.
Place your print on top
Carefully sit the paper mount on top of the plastic mount. Be careful not to move things around too much.
Secure frame
I like to put the insert that came with the frame back in (white side facing out) to make sure it neatly hides any gaps at the bottom of the frame between the bracelets. You then secure the back board to the frame. Once again, be very careful not to move things around too much.
Admire your handiwork!
Flip it over and check you are happy with the design, tweak if necessary.
